Zombie Response Team Vinyl Decal

I made these super fun zombie outbreak response team vinyl decals for my hubby’s jeep. He went on a bit of a Zombie Apocalypse kick there for a while (along with the rest of the world). He sent me this image in a text with a ‘LOL’ and I used Silhouette’s trace tool to cut it out this super durable permanent vinyl (seriously it has endured MO winters and FL summers) with my Silhouette SD.

IMG_1901 I posted it on Facebook and my dad liked it so much he ‘ordered’ one. So I tried out a two toned. His cop buddies at work fell head over heels and I ended up making a whole bunch more! IMG_0028Later, I found out a website makes them and I stopped making them all together. Here is the link if you just have to have them! http://zombieresponseteam.net. 

Felt Popsicle Matching Game

IMG_1872

Last summer we road tripped from Missouri to Florida and I wanted to make a few busy bag items for my then 2 year old using materials I already had. I saw a similar activity on Pinterest but was inspired to change it up a bit when I saw Silhouettes then ‘Free Shape of the Week”- a popsicle. How fitting for a summer trip. My girl is super smart and knows her colors well but its alway fun to practice.

I started by cutting the Free Shape of the Week and use it as a pattern for my felt Popsicle tops. I made two of each color. I started off blanket stitching the popsicles around the top leaving the bottom open like a pocket for matching the sticks. After stitching a few thought better of my time and ended up using Alena’s fabric glue. (The glue held up amazing. more than a year later these are still in the car for long trips)

For the sticks I simply wrote the color and a color circle for each popsicle on both sides of a tongue depressor.

Easy-peasy-lemon-squeezey.

Look how much fun!felt popsicle color matching

Love: Paper Ring Box Bachelorette Party Favor

While back I helped plan a super fun bachelorette party for a high schools friend. You should know by now paper is my favorite medium so I whipped up theses fun paper ring box favors. “Cara’s Final Fling Before the Ring” was the theme.

I cut the box from the Silhouette Shape Store. But because they didn’t have a proper ring box so cut the boos on half one three sides. I left the the back to create a hinge. I created the banner by printing and then cutting with my Silhouette SD a custom made shape. I needed the banner to be super long so I could curl it. I So wish I would have saved the image in Silhouette so I could share! I added a little paper pillow with the ring slit and slid it into place. After the box was constructed, I glued ribbon on and tied a cute bow. Voila!

IMG_1357 IMG_1358IMG_1372

I also made some super amazing, super inappropriate fondant cupcake toppers of the male anatomy. They are so not family friendly so I won’t share though I so badly wish I could!!!


Wedding Upgraded with Silhouette

Next few posts will be catching up from the past year. I got a marketing job and staying home with two kids has left little time to craft and even less time to blog. But no more!

Today I am sharing a few pictures from a best friends wedding I helped with a fall more than 3 years ago. They wanted upscale invitations and other expensive decorations for their fall themed wedding but couldn’t justify the custom prices. So I hooked them up.

I started by having them choose a leaf shape from the Silhouette Shape Store. And then used it throughout out the wedding.


fall bouquet IMG_0098IMG_1345


I arranged this silk bouquet. Turned out lovely and will last a lifetime!


IMG_0362IMG_0361


I printed place cards from a kit and cut leaves in coordinating colors.

IMG_1342


I printed and then cut the menus into a leaf shape with my Silhouette SD.

fall wedding center piece

She borrowed my glass apothecary jars from my wedding candy bar and filled them with fall leaves, gourds, and pinecones.  (at least they are getting some use!)

The invites were done with my Silhouette SD too but I can’t seem to find a picture. I asked the bride so I should be able to get one up soon!

Polymer Clay Figures

I have been working on several crafts for our upcoming family trip to DISNEY WORLD!!! Yesterday I finished a couple of polymer projects. I wanted to have a few things to give her through the day to make the disney trip special without spending a fortune. Souvenirs are so expensive in the parks. I have lots of other projects but this is what I have finished

Tinkerbell Jar
We are going to do Tinkerbell gifts, an idea I found here on Pinterest. Every night Tinkerbell will come and leave little gifts. The last night we will leave this little jar like we caught her.
20130618-130710.jpg

Just a jelly jar with polymer clay pieces inside. Tinkerbell on a toadstool surrounded but grass blades. Then I filled the bottom with loose glow in the dark stars. The stars make the jar kinda snow globe-ish. Tinkerbell and her wings also glow! I love how it turned out.

For a little gift after we meet Ariel I made a tiny mermaid. I know she will say “Where is her smile?” But I am truly terrible at faces. She will do.

20130618-130303.jpg

Stay tuned for more Disney projects!

Floating Wedding Subway Art- Vinyl

In case you didn’t know. I LOVE my Silhouette Cameo machine. If you don’t know what I’m taking about Google it! To say it like the Cricut is somewhat insulting. The only similarity is it cuts stuff. Anyways, I used it to make this super cute, super cheap wedding gift! Frame was only $6 and I already had the vinyl.
I arranged the wedding info in ‘subway art’ fashion and then split it up in to color groups to cut.

Once the Silhouette finished its cutting magic, I applied the vinyl to the outside of the glass. Some people put it on the inside but I find reversing the images silly and time consuming.

To create the floating effect I simply removed the cardboard backing from the frame. To keep the glass and mat in place I placed a large dot of hot glue in the four corners. It was so simple I can’t believe I have never done it before.

20130613-112110.jpg

20130613-112135.jpg

I love it so much I’m going to make one for me!

Falling for Washi Tape- Washi Popsicle People Tutorial

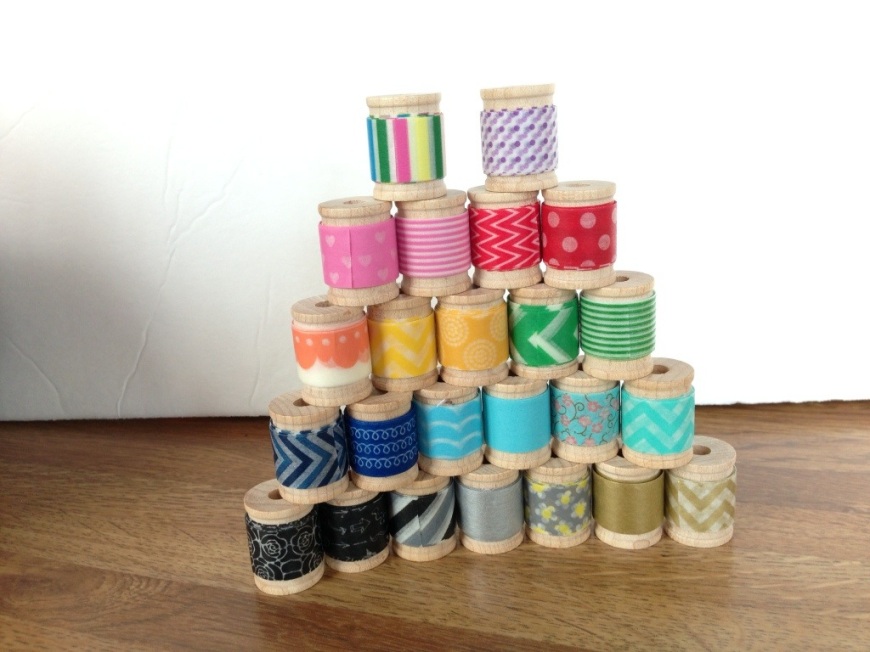
All the hype about washi tape has definitely peaked my interest. So I pinned a few projects and ordered 6 small rolls from this Etsy store. Then just a few weeks ago I won 16 more rolls in a Facebook giveaway from StickerShop! Look at this little stash!

20130527-104242.jpg

I started off using my stash for closing envelopes and decorating gift wrapping. Once I was a little ore familiar with it I realized washi is a less sticky than I expected and by no means permanent. With that in mind I set off to find my first big washi project. I found this on Pinterest byTeaWagon Tales

20130527-104733.jpg

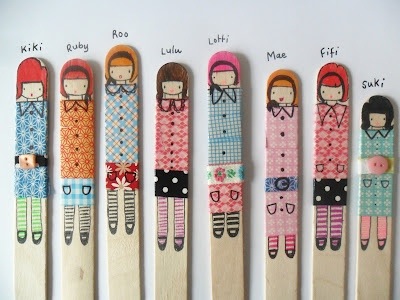
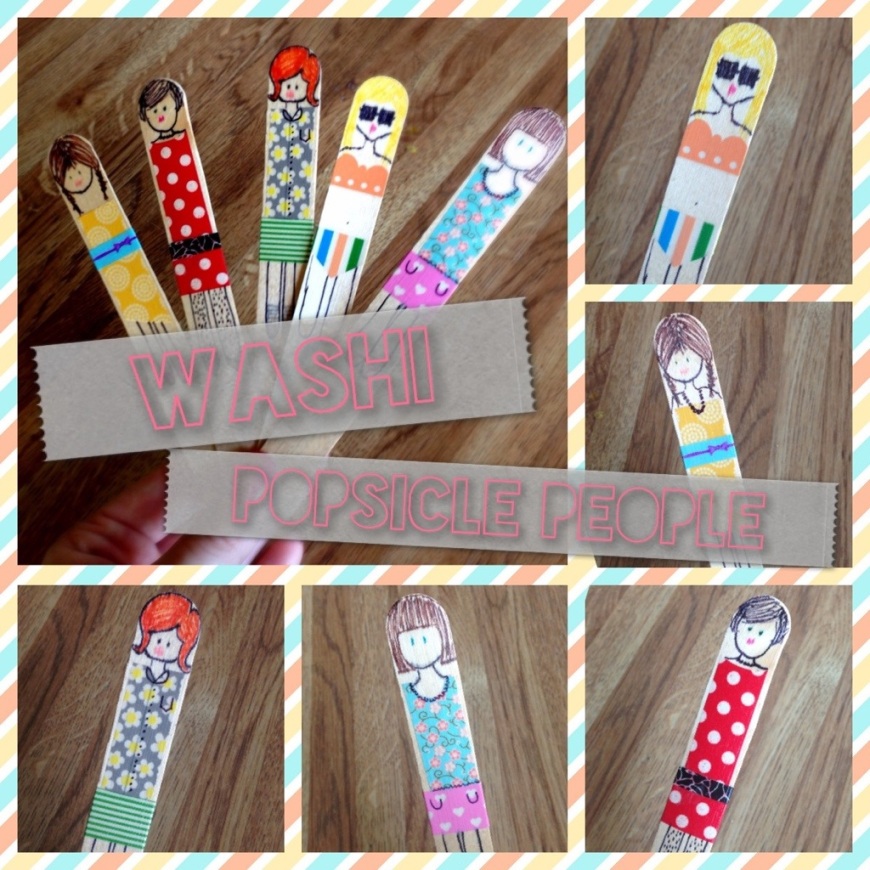
She calls them Lolly Dollies! Adorable right? My little one loves homemade goodies so I decided to go for it.
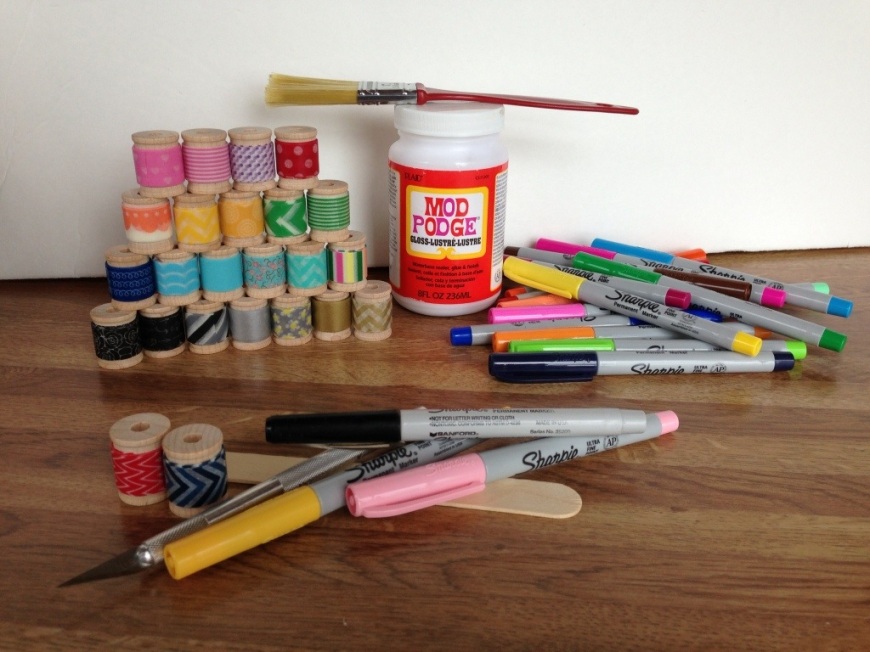
These are super easy! This is what you need…

20130527-105715.jpg

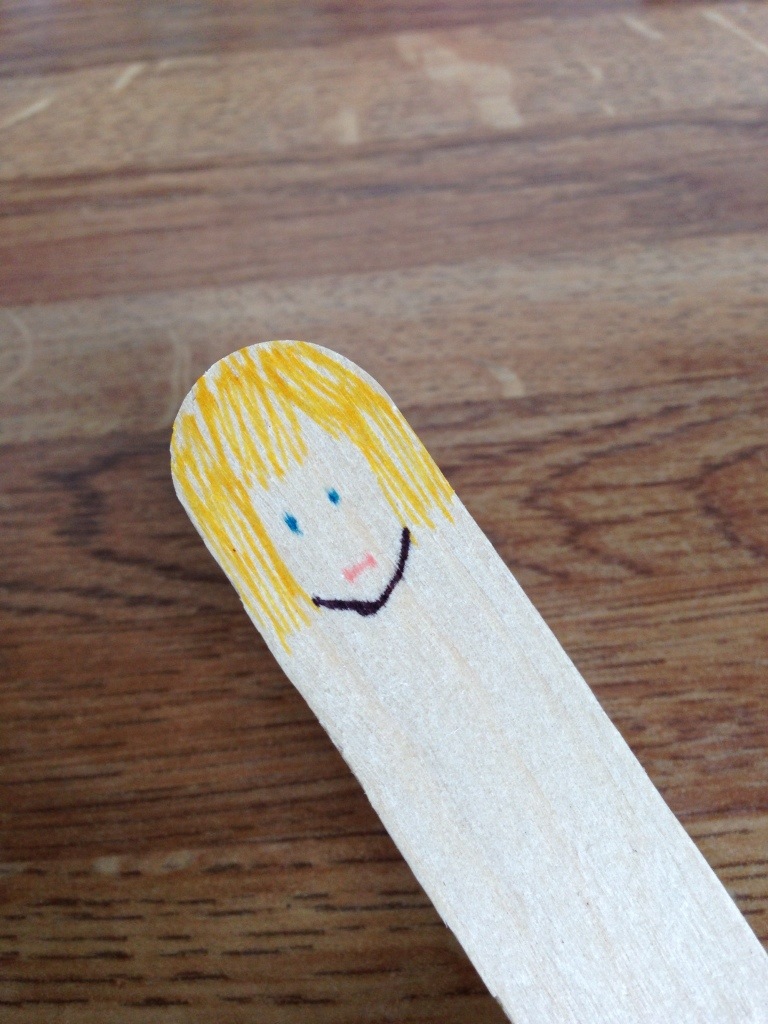
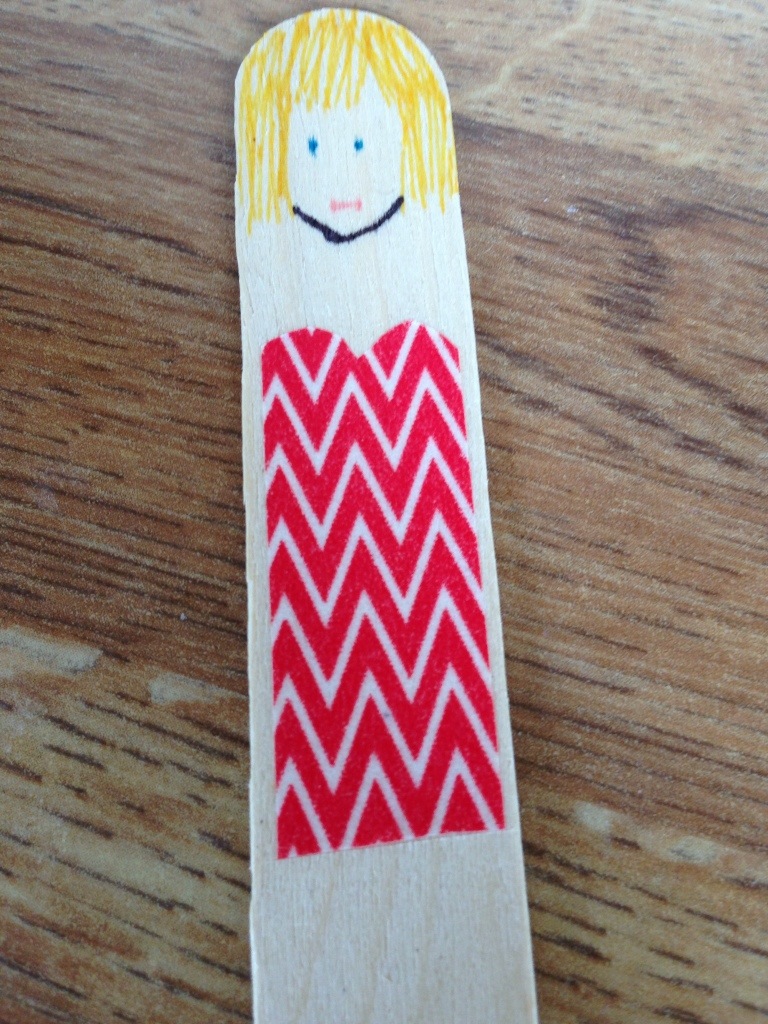
Start off with a large, blank Popsicle stick (aka tongue depressor). Mine had a ‘better’ side. One side the markers bleed really bad. The smoother of the two sides worked best.

Draw on the face and hair. I made my faces about a half inch tall.

20130527-110040.jpg

Then pick a washi pattern and apply your shirt. I cut a cute neckline.

20130527-110206.jpg

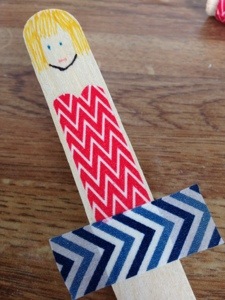
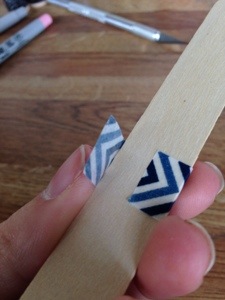
Choose and apply your bottoms. I choose to wrap the washi around the stick in hopes it would stay better. In this case my bottoms were shorts and I cut out a little wedge for the legs. (EDIT: wrapping didn’t really make a difference in fact the wrapped part peeled up a bit)

20130527-111613.jpg

20130527-111708.jpg

20130527-111731.jpg

Once the clothes are finished. Use a thin Sharpie to fill in the neck and shoulders, then the legs. I also added a few other little things like straps and flip flops. Some of the popsicle people have necklaces, buttons, collars,and pockets. Just use your imagination.

20130527-112913.jpgq

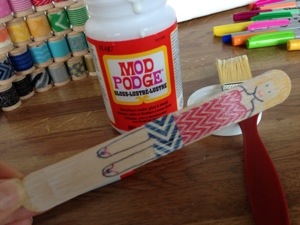
After all the decorating was done, I coated both sides with a thin coat of Mod Podge then set out to dry.
I used gloss because that’s what I had on hand. Next time I will get some matte or just use Elmer’s. The gloss is a little sticky feeling.

20130527-113828.jpg

20130527-114000.jpg

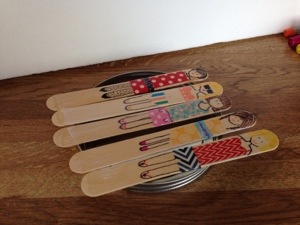
Voila! Washi Popsicle People! So cute! My daughter was confused on why there were only girls so I guess I’ll start on a group of boys!

20130528-115152.jpg

Washi is very versatile. Since this project I have made a few cards and other little projects. I’m definitely hooked! Have you tried washi tape? What are some of your favorite projects?


Find this post and other great projects at theses Linky Parties:
http://www.craftyconfessions.com


Falling for Polymer Clay – Bow Necklace Tutorial

After writing about polymer clay the other day I couldn’t stop thinking about it. I have SO much clay. I either need to use it or sell it to make room for crafts I love. Like I said I love the medium. It easy to work with and the possibilities are endless. My problem was the possibilities I could come up with we’re kinda useless. So I’ve been racking my brain what could make and love? What could I make that others will love? Maybe even sell? Today I wanted to get started on some gifts for my good friend baby girl. I have lots of time but who can resist making tiny baby bows? I thought I’d try a new, easier route and use my Silhouette to cut a 3D bow out of fabric. Then out of no where it hit me. Make the bows out of polymer clay! Duh!

So my crafting epiphany lead to my first tutorial on Crafting Crush.

Start off cutting a pattern. I used my Silhouette. I picked the 3D bow and cut it in a few sizes. I wasn’t exactly sure what I wanted nor what I was going to do with these bows. I chose to use the 2.5″ and 2″ width patterns. If you dont have a Silhouette you can find patterns here and here.

IMG_1377

Then pick a color (or a few) of clay and work them up. It was taking about longer than I had the patience for so I popped the balls of clay I the microwave for 20 seconds. Perfect. Then I cranked it through my super nifty pasta maker to flatten it out. Sure I could have rolled it out but the pasta maker ensures a perfect, consistent thickness every time. Love it!

IMG_1379

Once the clay is nice and flat, place the pattern and carefully cut around it with an Exacto knife.

IMG_1380

The pattern calls for folding in the bow flaps.

IMG_1382

I used a clay tool to press the flaps down in the middle.

IMG_1383

Then fold down the middle flap and press it down on the side. It will need to be smoothed out a bit after it was pressed so it looks nice.

IMG_1386

At the last second I decided to pierce little holes (or hole) for jump rings.

IMG_1387

It’s ready for the oven. 10-20 minutes at 275 degrees.

IMG_1388

I rummaged through my jewelry box for broken necklaces and orphaned chains. This is the result.IMG_1393 IMG_1395 IMG_1392 IMG_1399

The last one was another experiment. I got a woodgrain embossing plate with my polymer clay haul and thought I’d try it out. the tree design needs some tweaking. I think this has lit a flame in my crafty little heart. I’ve fallen for polymer again!

Picture Silhouettes

I cut these by hand with an Exacto knife. Just as gifts. No real reason just came to me and decided to try it. I loved the results but there is no surprise there, paper is my favorite!

Screen Shot 2013-05-11 at 1.52.34 PM Screen Shot 2013-05-11 at 1.53.52 PM Screen Shot 2013-05-11 at 1.55.22 PM

I did quite a bit of paper cutting by hand before the miracle of the Silhouette Craft Machine entered my life. I will share more in another post.

Playing Around with Polymer Clay

After an spending the whole of my daughters afternoon nap perusing Etsy I got an itch to try miniature polymer clay foods. Weird itch, eh? Basically I decided “Hey I can do that!” After a very quick craigslist search I found a lady looking to unload a sizable collection of polymer clay and jewelry making tools. $25 sounds reasonable. I met her and its an entire moving box of stuff! I got a pasta maker (for flattening the clay uniformly), lots of molds and cutters, and over $150 worth of clay. Great deal. As soon as I get home I dive right in.

I was pregnant at the time (thus the impulse buying) though I didnt know the sex I had set my mind on a “Cutie Pie” themed shower. I was going to sever various kids of pie and it was going to be adorable. Part of the plan was to serve milk in champagne glasses so for glass markers I wanted to make a variety of pie slices. These are the result:

IMG_1524 IMG_1525IMG_1532IMG_1535

I have to say they were super duper fun. I really enjoyed the medium and learned some fun new techniques. I this this crush could easily turn to love if I could find something useful to do with polymer clay. I dont really care for the polymer jewelry look and what in the world do you do with little clay statutes? I could make tons of wine glass markers but come on I only need so many. Any other suggestions? I got the stuff. What else could I do with it?


BTW I didn’t have the “Cutie Pie” shower of my dreams but I did have a small, adorable “Milk and Cookies’ shower.